Changing/editing the text within a template

* originally posted on the old ewcouture.com blog, on March 20th, 2014
Photoshop's Type Tool is a powerful (and complex) tool. I will keep the pointers in this post somewhat simple and limited to the basics one needs to know, to be able to customize an already designed template.
If you would like to dive deeper into all the magic that the Type Tool can help you achieve, check out the linked article, for a fairly comprehensive introduction to the type tool, on tutsplus.com. It's a good start.
Editing and changing the text in a template is a pretty straight forward task.
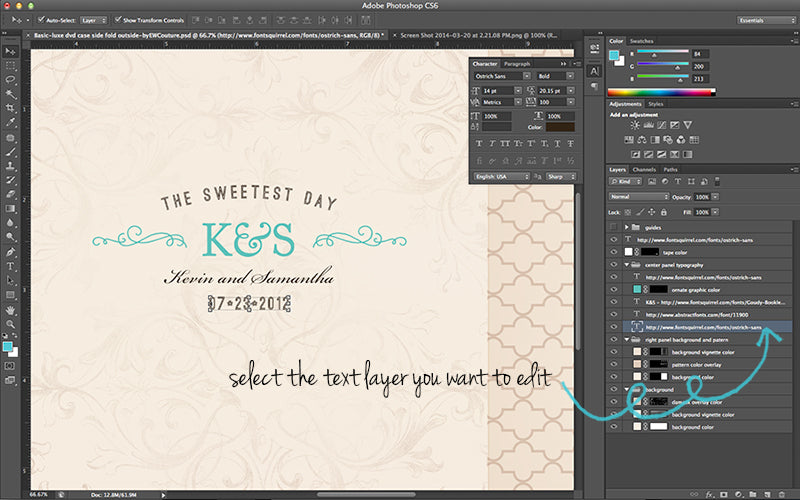
1. Open the .psd template file and select the text layer you want to edit, in the layer palette.
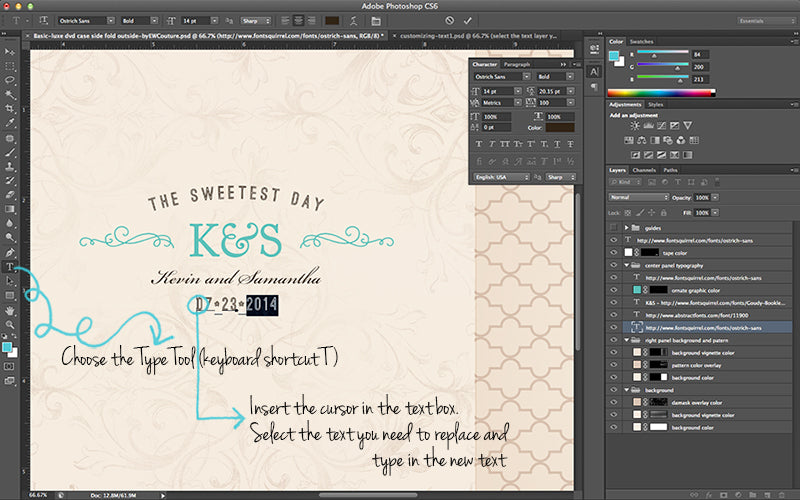
2. Choose the Type Tool. It is located on the Tool bar as the letter T. You can also select it by using keyboard shortcut T. Insert the cursor in the text box. Select the text you need to replace and type in the new text.
Note - If you like using shortcuts, to exit the text box you’re currently editing, and commit to that edit press Command + Enter for Mac users or Control + Enter for Windows. After that, you can use a keyboard shortcut to switch tools. You might've found yourself in this annoying situation before: You are in a text box in Photoshop, editing your text. You try to switch to another tool like the Move Tool, for example (keyboard shortcut V), only to type the letter “v” in your text box. ...So don't forget, before switching from the Type Tool to another tool using a shortcut, Command+Enter (Control+Enter) is your friend. :)
BASIC TEXT & PARAGRAPH FORMATTING
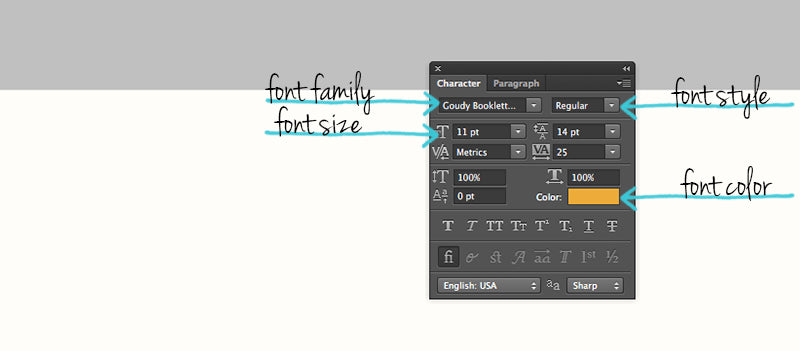
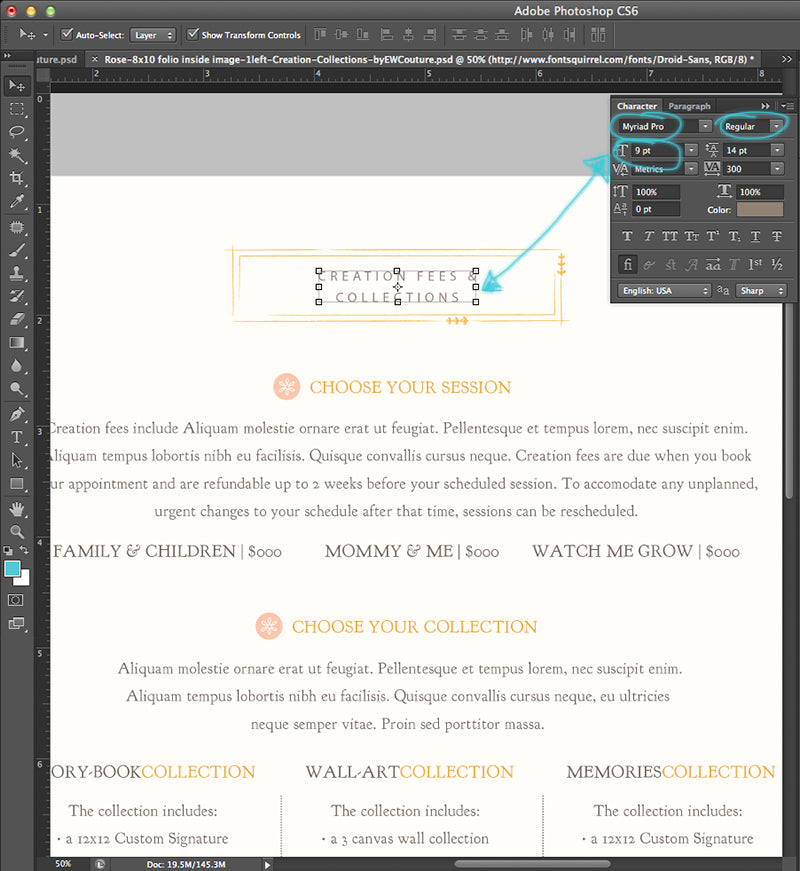
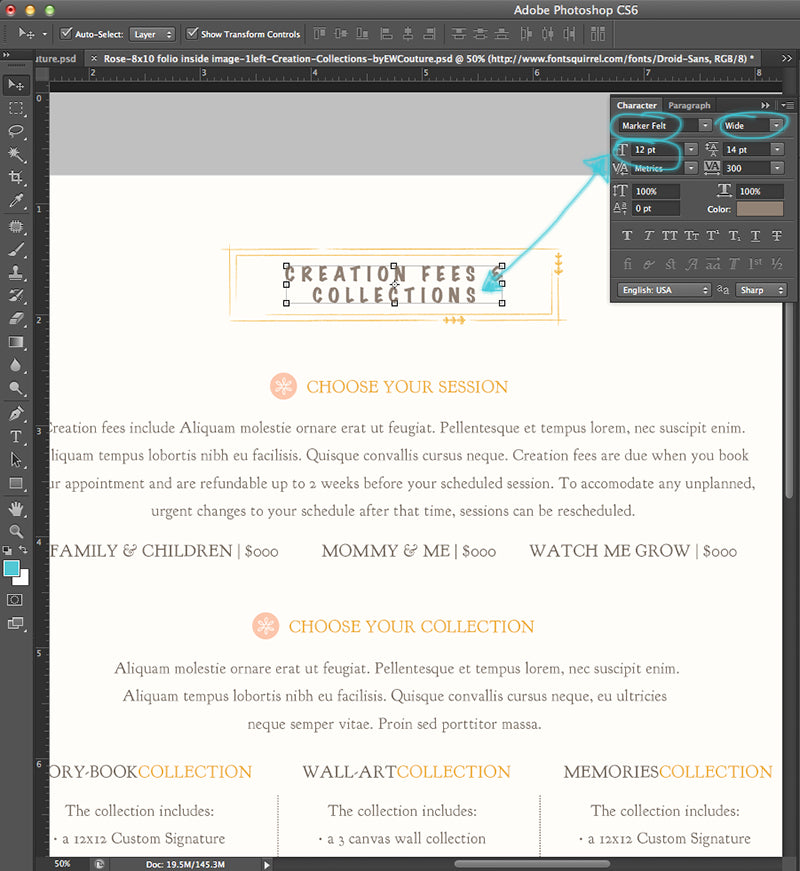
• Changing the Font Family and /or the Font Style. Changing the Font Size
• Changing the Text Color
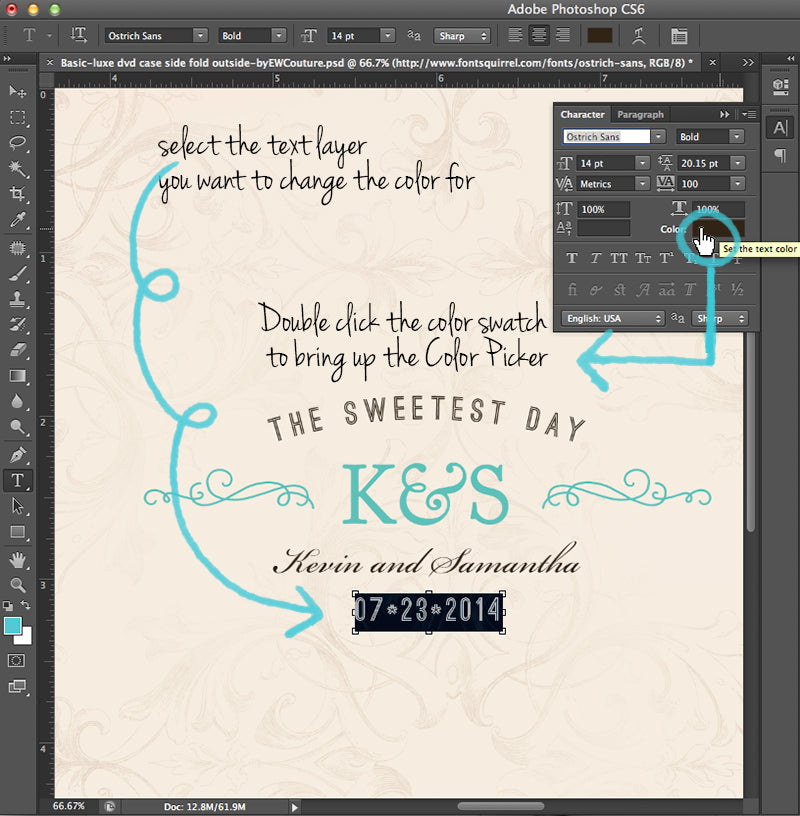
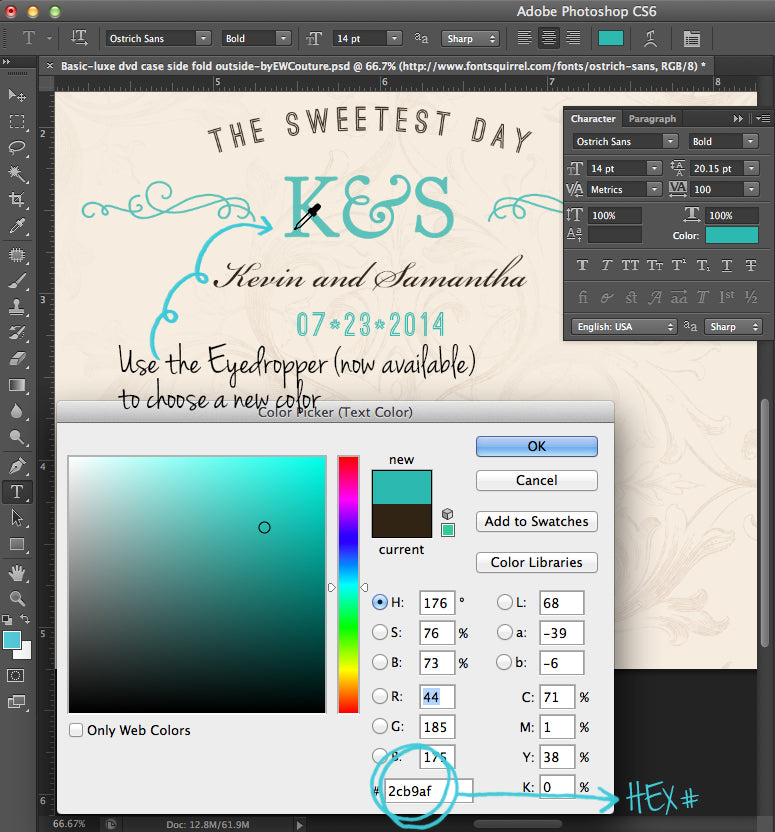
Using the Type Tool, select the text you want to change the color for. Once the text is selected, roll your mouse over the Color area in the Character palette. Double click the color swatch to bring up the Color Picker. Use the Eyedropper (now available) to choose a new color, or type in the HEX code number of the color (if you already know it).
• Increasing and reducing the space between letters (TRACKING)
You can customize the tracking values to increase or reduce the space between the letters, by typing a numeric value (positive or negative) in the Tracking field or by selecting one of the presets.
![]()
![]()
• Adjusting the vertical space between paragraph lines (LEADING)
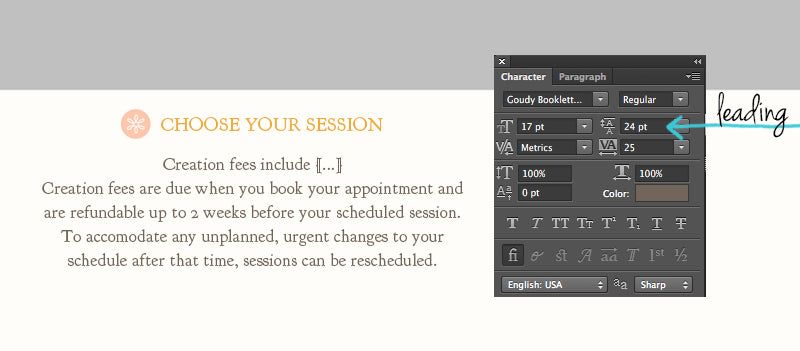
Adjusting the vertical space between paragraph lines is known as adjusting the leading in a paragraph. Leave it as an automatic value by selecting (auto) for the Leading value, or type a custom value to adjust the space by yourself.

Most of the text in any of the EW Couture templates is included as live, customizable type layers. Please note, fonts are copyrighted by their artists and can not be re-distributed with the files you purchase or download. However, most all EW Couture designs use free fonts, readily available for free download. You will find the web addresses where you can download the used fonts from, in the layer names. Simply copy and paste each link in your web browser. Once you download and instal the font, reopen the files and customize the text as needed.
Please do feel free to replace any of the fonts I use in the designs, with your own fonts. www.dafont.com and www.fontsquirrel.com are a great resource for free quality font options.


Leave a comment