Tutorial - How to add clouds to a plain sky in Photoshop


* originally posted on the old ewcouture.com blog, on July 6, 2012
How to add clouds to an image in Photoshop
After releasing the 8-pack of free high resolution cloudy skies image overlays last month, I received a number of emails asking for some tips and help on how to best apply them to images.
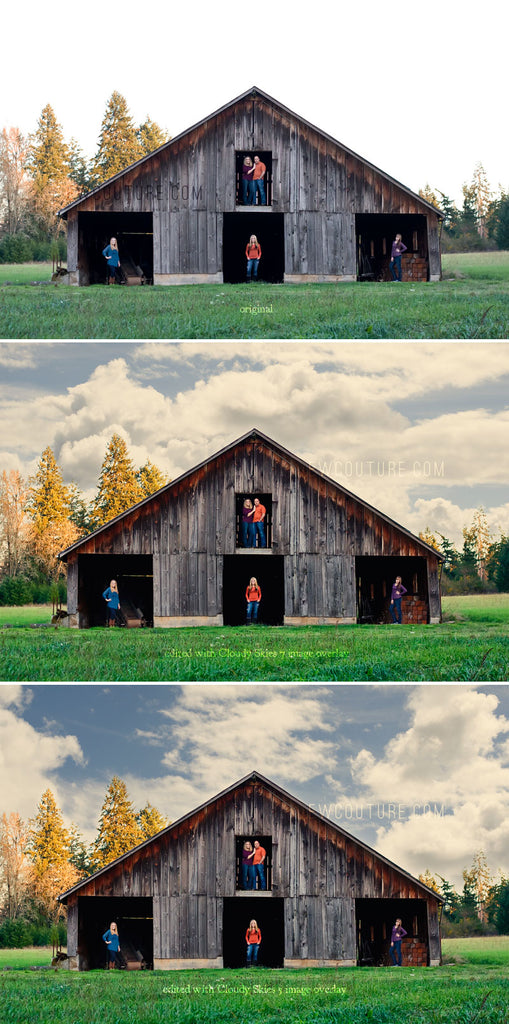
- Add the cloud image overlay to your photograph before you post process it, especially if you are going for a washed out, vintage look. It will help with getting a natural, realistic, even look in your final image.
- Start with a well exposed image. If your image is on the brighter, lighter, high key side, adjust the opacity on the cloud image overlay to match the feel and look of your image.
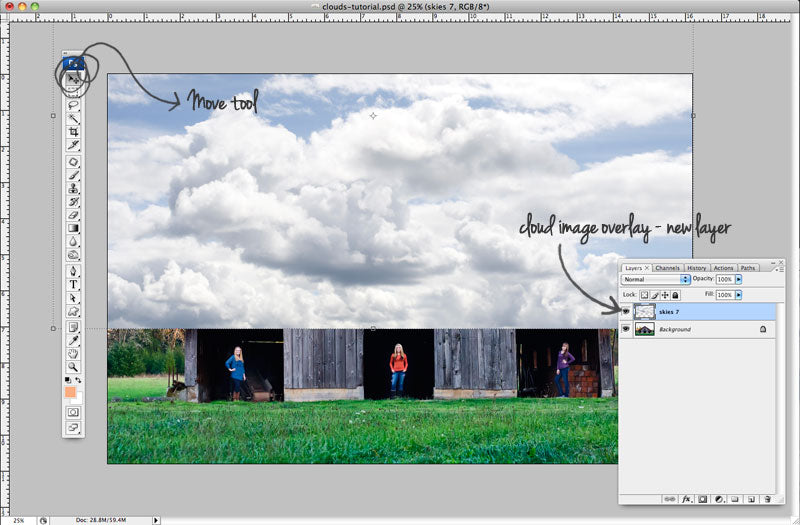
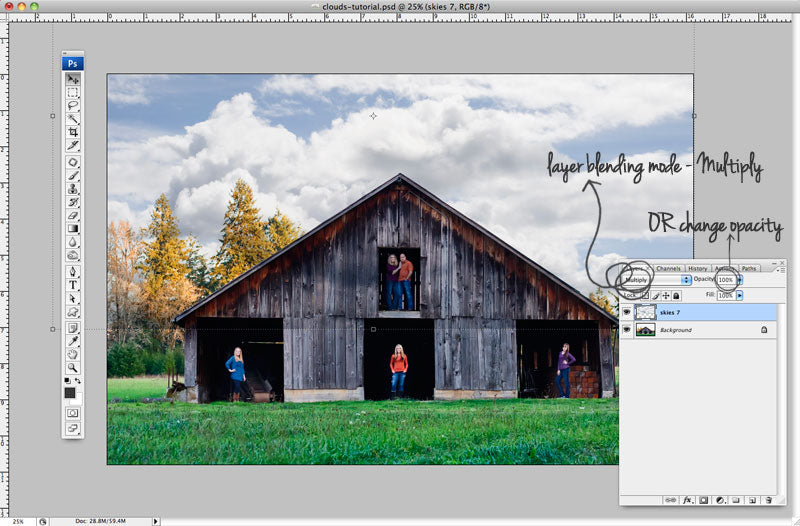
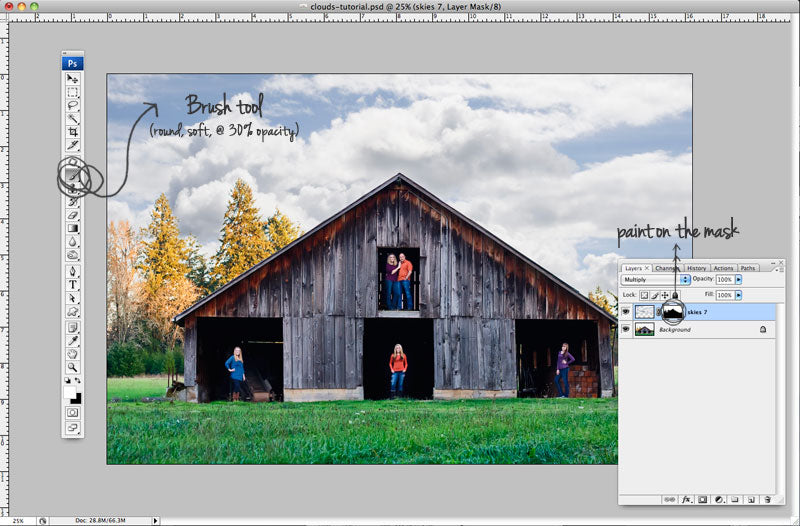
2. Change the layer mode to Multiply for the the cloud image overlay layer, while looking for the best position and composition.
As an alternative, bringing down the opacity of the layer while you position it over the photograph will also work really well and help you accomplish the same result. Don't forget to bring the opacity of the layer back up, so it matches the overall feel and contrast of the image.
I like to use the layer blending mode "method" - it makes for a smoother, cleaner transition when masking the parts of the clouds overlay you don't want visible in the image (from step 4). Changing the layer blending mode to Multiply works best especially when your sky is completely void of color and other elements.
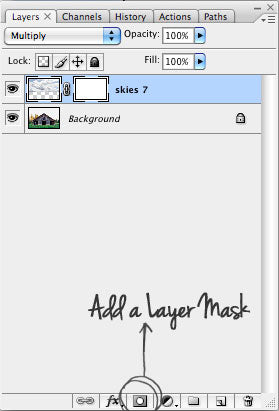
3. Add a layer mask, to the cloud image overlay layer. Highlight the layer and click the Add Layer Mask button, at the bottom of the Layers palette.
Or, as an alternative, choose Layer > Layer Mask > Reveal All/Hide All.
4. Click on the mask, to select it. Using a soft, round brush, at 30% opacity, "erase" the parts of the clouds overlay that cover the subject of your image.
• Before starting to paint on the mask, reset your background/foreground colors to the default black and white, using the "D" key.
• You can toggle between the two using the "X" key. Painting with black on the mask will hide your clouds layer. If you hid too much of the layer, painting with white will reveal the masked texture overlay and paint it back in.
• Use the bracket keys < and > to increase or decrease the size of your brush.
Usually I like to start with a 300 px soft round brush, and change the size depending of the areas I need to paint - larger brush for larger block areas, smaller brush size for detail areas, like trees and branches.
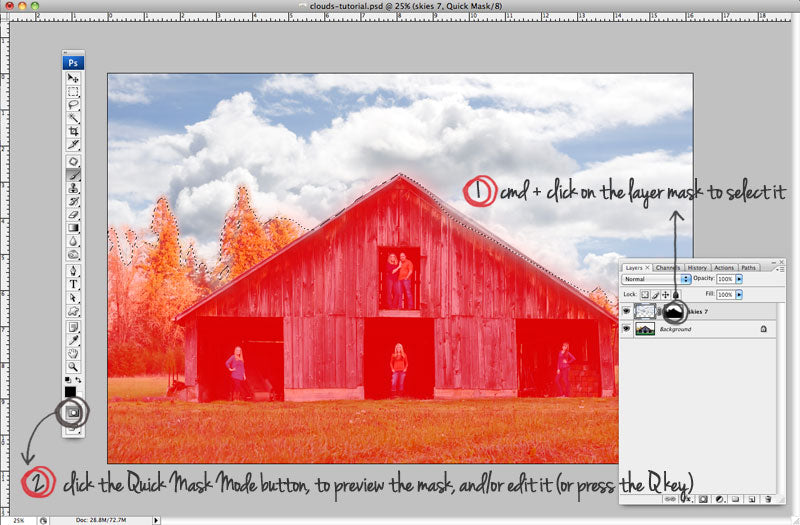
5. To preview your mask and double check on any of the areas that you might've missed and didn't mask out, change the layer blending mode back to normal. Or even better, switch to (and do any additional touch up edits) in Quick Mask Mode.
>> cmd + click on the layer mask to select it
>> click the Quick Mask Mode button to preview the mask, and/or to edit it (or press the Q key)
** pressing Q again (or the Quick Mask Mode button) will take you out of Quick Mask Mode. ** Click cmd + D to deselect your mask.
I hope you find the cloud overlays and the tutorial helpful. Enjoy, and have fun using them. Please share your creations on the EW Couture Facebook page; I would love to see them.
//////////////////////////////////////////////////////////////////////////////////
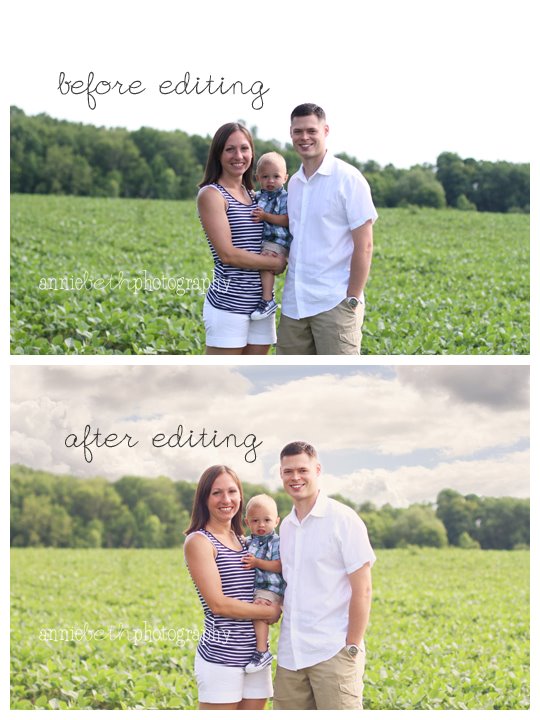
Here is a great before and after shared on the EW Couture Facebook page by Annie Beth Photography.
Her final image edit is softer, more washed out, with a vintage feel, compared to my edit. I really like the blending of the overlay in the original image, and the natural looking edit she achieved. Thanks for sharing Annie!
Leave a comment